Posts Tagged ‘tutorial’

h1

Using the brushes even if you don’t have Photoshop

February 15, 2008

There is brilliant free (opensource) program ABRviewer which extracts PNG images from photoshop brush sets. What this means is that you can use it to convert brush sets that were made in CS3 or CS2 to use in older versions.

For instance, I use Photoshop 7, but if I try to download a brush set made in CS3 it won’t work and I get an error message. Very frustrating when you’ve just found an amazing set that you can’t wait to try out.

Extracting the PNG images is also useful for non photoshop users, and for digital scrapbooking etc. It makes the images contained within brush sets available to everyone, in any graphics editing software.
Read the rest of this entry ?

h1

Quick Tip

February 8, 2008

handtool.jpg

To quickly activate the hand grab tool (which moves your image around the canvas if you’re zoomed in) just hold down the space bar. When you let go, it will revert back to the tool you were using.

happyface.jpg

h1

How to use patterns (photoshop beginners)

February 8, 2008

Using pattern fills in graphics and logos is big news for 2008. The emerging trend sees flat vector artwork being filled with ornate floral or retro patterns for a clean but textural look. The trend has crossed over from the use of retro and art nouveau wallpaper in interior design, and is now being picked up by the graphics industry. To get in on the trend…

Heres one way to do it

There are many ways to use photoshop patterns. In this short tutorial I’m going to show you a simple way to achieve some interesting effects.
Read the rest of this entry ?

h1

Make your own brushes

January 21, 2008

Its pretty simple to make your own brush sets. Here a quick tutorial.

MAKING BRUSHES
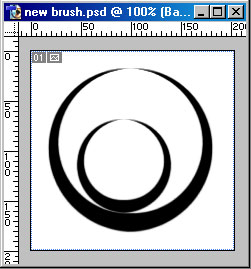
1. Open a new blank image with a white or transparent background.
2. Design your brush. This can be hand-drawn, a photo, a scan –
basically anything.
I made a simple circular image
.New brush design
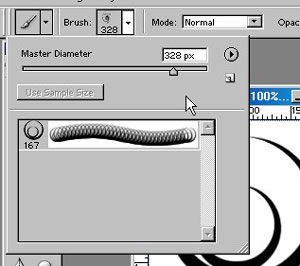
3. Now go to Edit > Define Brush, and click OK.4. Select the brush tool,
and click on the dropdown brush menu (across the top toolbar). Scroll
down through the brushes and you will see your brush at the bottom
ready to use.
New brush example
5. Thats pretty much it, though you now have to save the brush you’ve made.
SAVING BRUSH SETS
1. You need to save the brush you’ve just made on its own. So delete all the others that you didnt make..
Hovering over a brush thumbnail, press alt and you will see a pair of scissors appear. Click to delete the brush.
2. Now you have to go through and delete all the other brushes
except the one you made.
Just one brush left
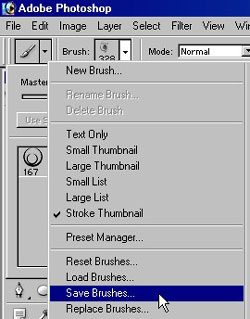
3. Now you can save this brush on its own, ready to use next time you want it.
Just go to the little arrow on the right and select ’save brushes’. Name your file
and hit save.
save brushes4. Of course you can keep going and make more brushes to add to the set.
You just have to save over the same filename each time you add a new brush.
I find myself switching between the default photoshop brushes and loading my
brush sets in order to create new ones. Slightly fiddly but worth it so you can
keep a store of images as brushes to use regularly.

TIP

Make one brush and save it on its own ( i use my ’signature brush’ –
you’ll see it at the top of each of my brush sets). This saves you doing step 2.
above and having to delete all the other brushes every time you create a new set.